
This article covers the steps you need to take to add expense claims in Primo Umbrella, either individually or in bulk.
Bulk Import
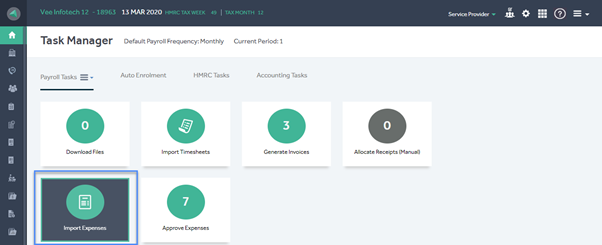
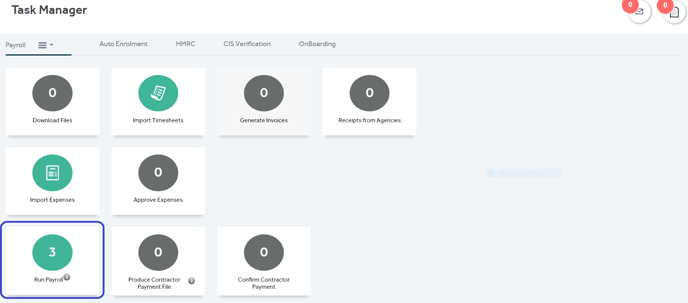
Step 1: Click on “Import Expenses” in the Task Manager screen.
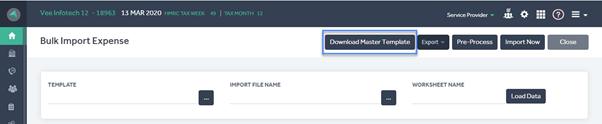
Step 2: Click on “Download Master Template” to download an Excel template file. Enter the expense data into the template and save your file.
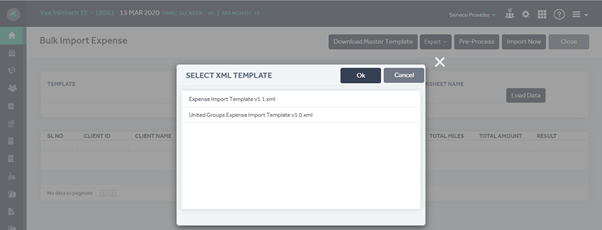
Step 3: Click on this  icon next to the Template field, choose the correct template file from the list and click “Ok”.
Step 4: Click on this  icon next to the Import File Name field, select your completed expense file and click “Upload”.
Step 5: Enter the name of the worksheet within your Excel file that contains the expenses data in the Worksheet Name field. Note: this is Sheet1 by default in the Excel template.
Step 6: Click on “Load Data” and once your data appears in the grid, click on “Pre-Process”.
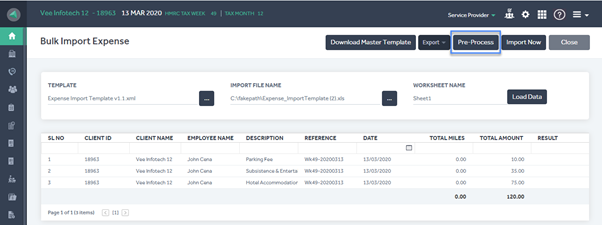
Step 7: If the pre-process is successful, click “Import Now”. If the pre-process is not successful, click “Cancel”, make any necessary changes to your data and go back to Step 4.
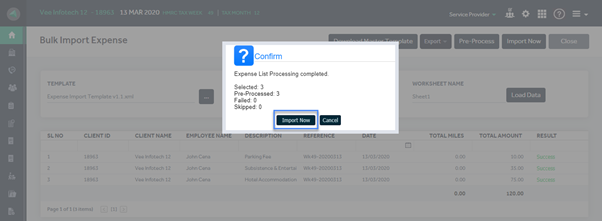
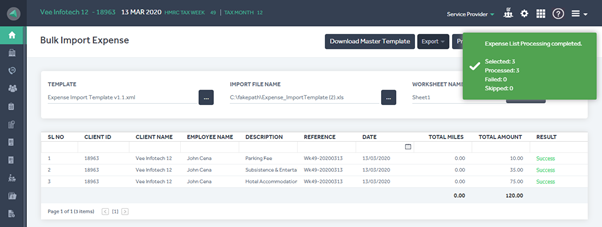
The expense import is now complete. You’ll see a pop-up message to confirm this.
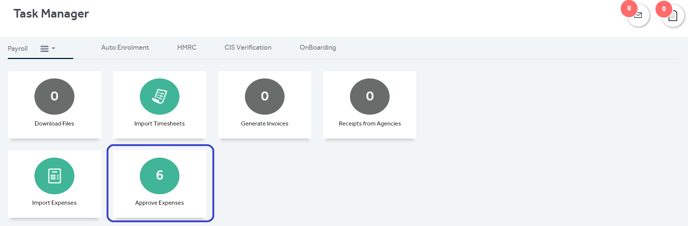
Step 8: After the expenses are uploaded you will see the count appear on the “Approve Expenses”, clicking on it will open the Approve Expense screen.
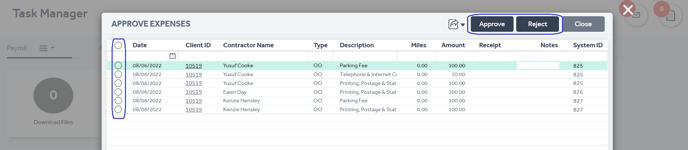
Step 9: Select one, multiple or all expenses from the list and proceed to Approve or Reject them.
Afterward, proceed with your payroll process.
Individual - from Contractor List
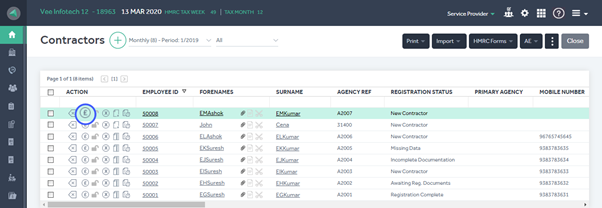
Step 1: Go to your contractor list and click on this  icon under the Action column next to the contractor you want to add an expense claim for.
Step 2: Enter all relevant information, attach a copy of the receipt or invoice and click either “Save & Create New” if you’d like to add another expense claim, or click “Save Exit” if you’re finished.
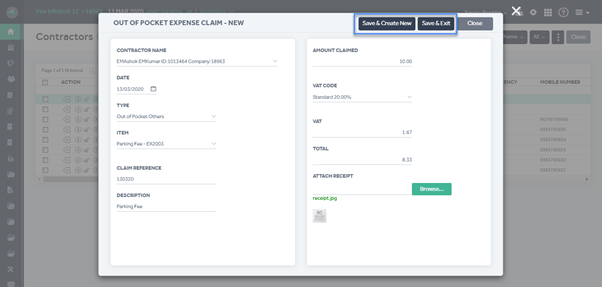
You will see a pop-up message confirming that your expense claim has been saved successfully.
