Emailing Payslips
Step 1: After processing the payroll, click the ‘P11’ button.

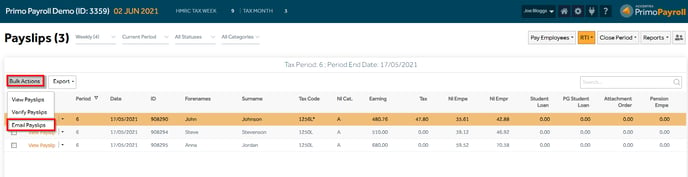
Step 2: Select the required employees you wish to email the payslips to and click ‘Email Payslips’ under the ‘Bulk Actions’ dropdown.
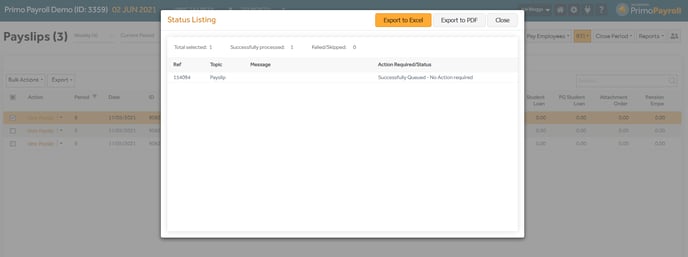
 The program will display the status of the email sent and if there is any error message, the user can act accordingly.
Email Status Tracking
Go to the ‘Reports’ menu and click ‘View Email Que’.


The screen will display the emails that are yet to be sent which includes any failures due to incorrect data or Email Settings as described under the ‘Process Exception'.
If the error is with the email settings, select the item and click the ‘Clear Exception’ button which will remove the Process Exception message and retry the email. If the error is due to an incorrect email address etc., then correct the email address and click the ‘Resend’ button to resend the email. Or, if you wish not to send that email, select the item and click ‘Delete’.
