This article will guide you in creating a new payment & deduction code in Primo Payroll.
Payment Code
Step 1: Click the ‘Settings  ’ icon as shown below.
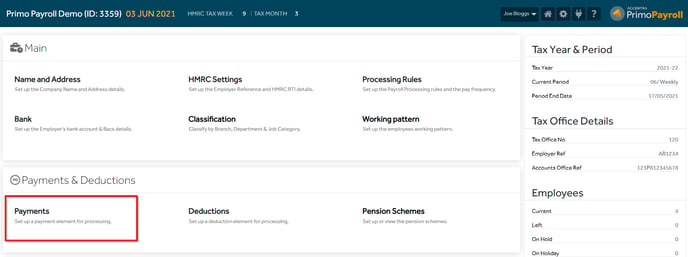
Step 2: Click the ‘Payments’ under the ‘Payments & Deductions’ section.
Settings → Payments & Deductions → Payments
Step 3: This will show a list of existing payment codes along with its parameters. Click the  button to add a new payment code.

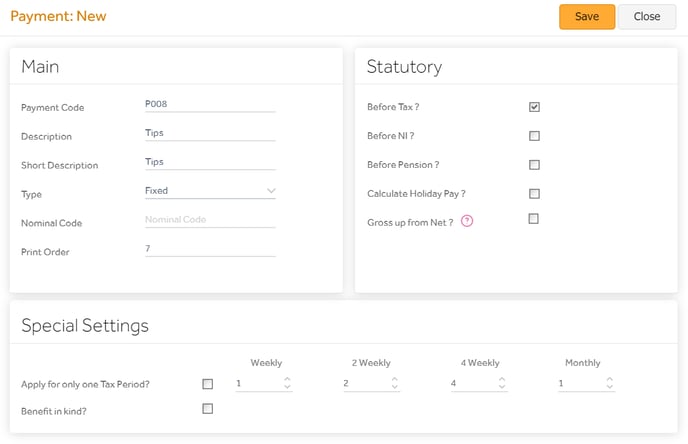
The ‘Code’ will be automatically generated by the program. Fill in the ‘Description’ and select the ‘Type’ from the dropdown menu. Select the applicable parameters by ticking the relevant boxes.
You will see a pop-up message confirming that this action has been completed successfully.
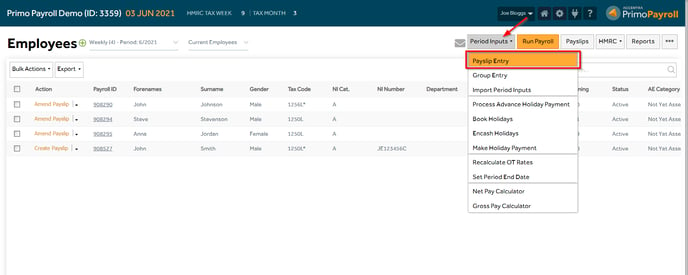
The new payment code is now available to be used in the ‘Payslip Entry’ screen from the ‘Period Inputs’ dropdown menu. Employees → Period Inputs → Payslip Entry
Deduction Code
Step 1: Click the ‘Settings  ’ icon as shown below.

Step 2: Open the ‘Deductions’ under the ‘Payments & Deductions’ section.
Settings → Payments & Deductions → Deductions
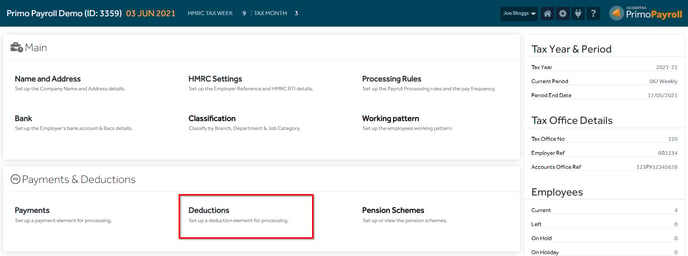
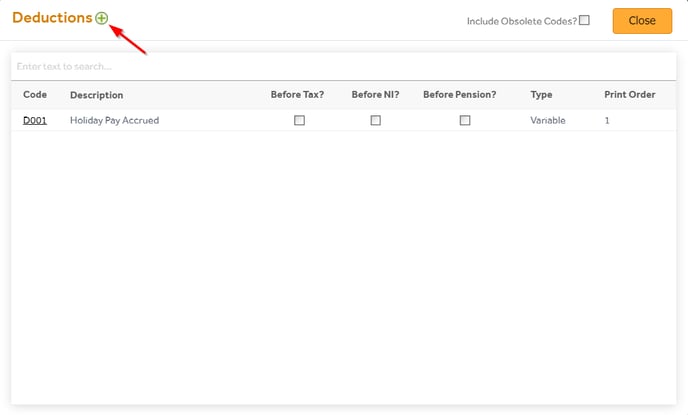
Step 3: This will show a list of existing deduction codes along with their parameters. Click the  button to add a new deduction code.
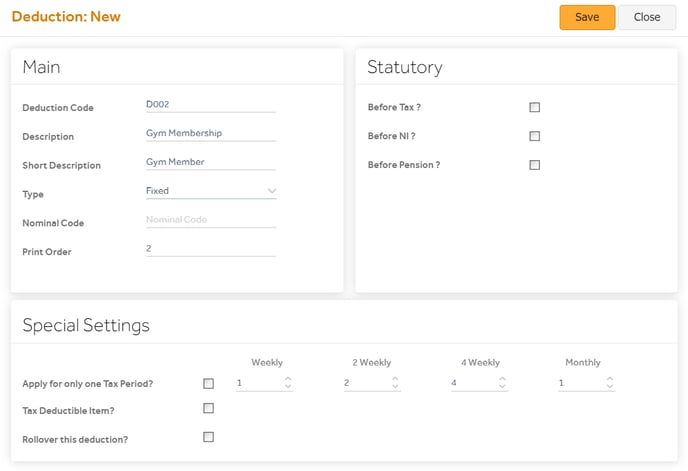
The ‘Code’ will be automatically generated by the program. Fill in the ‘Description’ and select the ‘Type’ from the dropdown menu. Select the applicable parameters by ticking the relevant boxes.
You will see a pop-up message confirming that this action has been completed successfully.
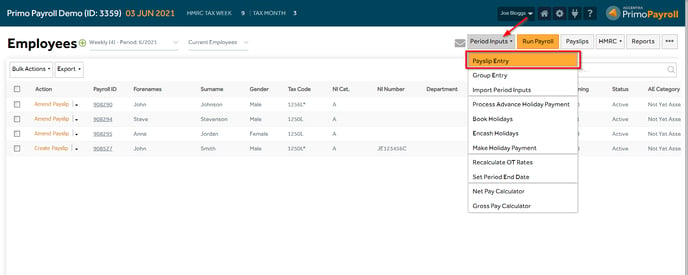
The new deduction code is now available to be used in the ‘Payslip Entry’ option from the ‘Period Inputs’ dropdown menu. Employees → Period Inputs → Payslip Entry
