
This article will guide you in creating a new agency record (manual & import method) on the Primo Umbrella portal.
Manual Method:
Step 1: From the Main Menu, click ‘Agencies’. Click the + icon as shown below to create a new agency.
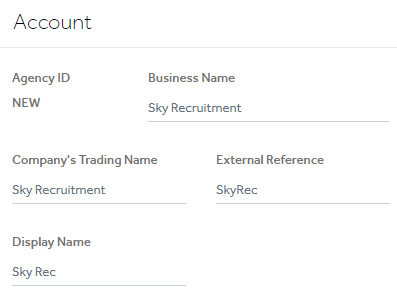
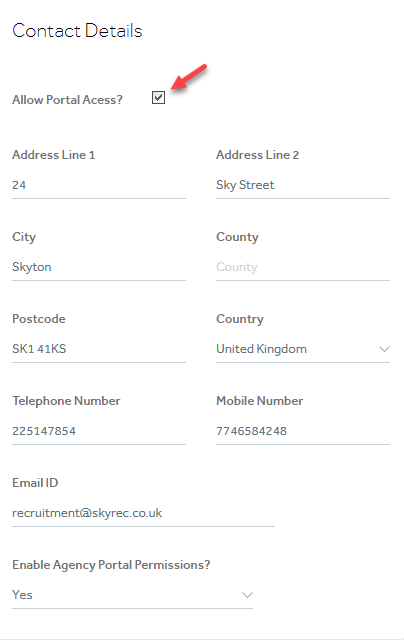
Step 2: Fill in the agency details. You also have the option to grant access to the Agency to view their portal as highlighted below.
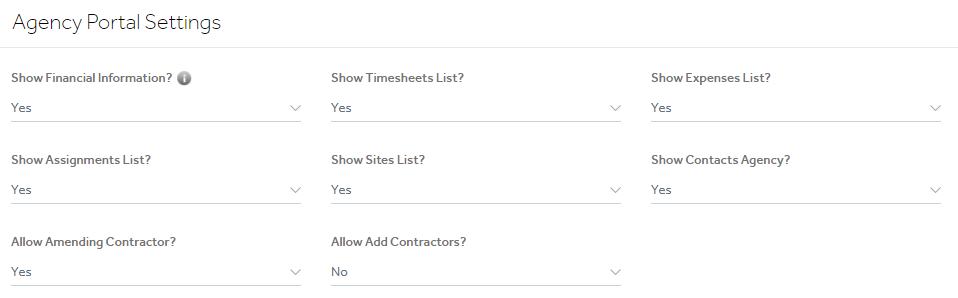
The Agency Portal will be set up based on the below settings chosen.
The ‘Financials’ section will determine the invoice generation method (whether the timesheets imported should be consolidated as one invoice or not), the VAT rate applied, the invoice distribution method or invoicing currency.
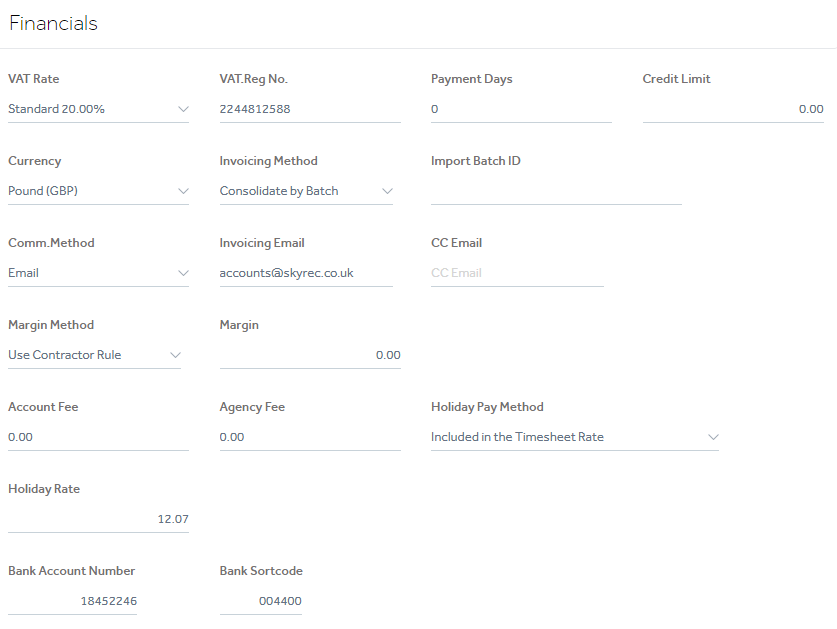
The margin to be deducted from the contractor should be mentioned in the ‘Margin’ field and on what parameter the margin should be deducted is to be mentioned in the ‘Margin Method’. For more details, click the link to view the Margin method article.
Step 3: Click ‘Save’
If any of the mandatory fields have not been filled, the system will warn the user to fill it up. Once the agency record is saved successfully, you’ll see a pop-up message confirming this.
Import Method:
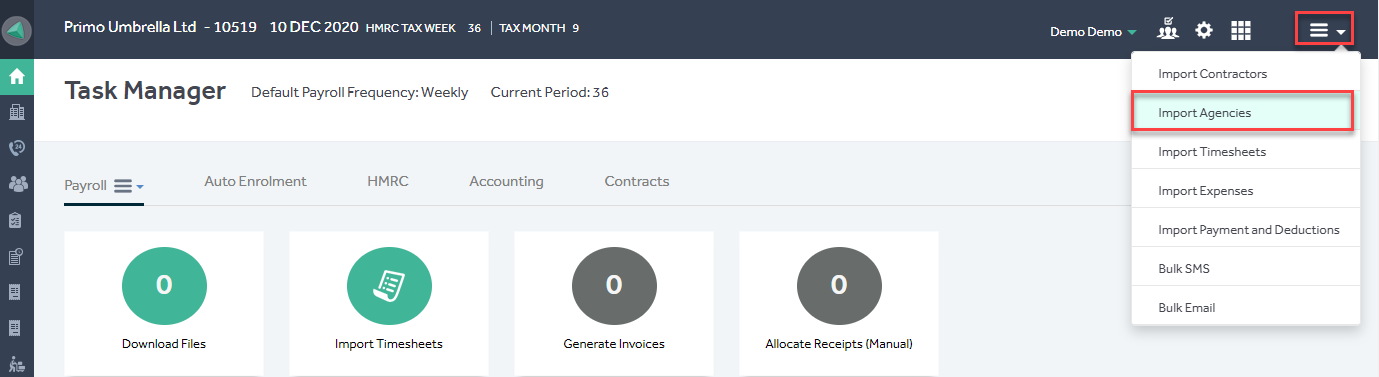
Step 1: Click ‘Import Agencies’ in the ‘More’ menu in the upper right corner as shown below.
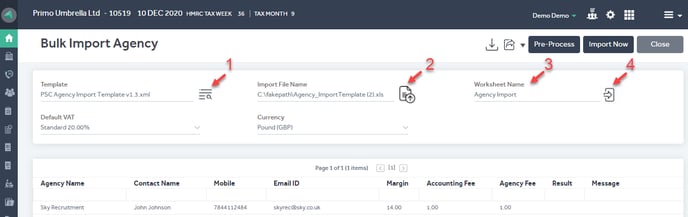
Step 2: Click the  icon to download an Excel template file. Enter the agency details in the template and save your file. The ‘Mandatory’ fields are highlighted in the document.
Step 3: Click the  icon next to the Template field, choose the suitable template file from the list and click ‘OK’.
Step 4: Click the  icon next to the Import File Name field and select the Import File you’ve filled in.
Step 5: Re-name the worksheet in your Excel file (that contains your agency details) from ‘Sheet 1’ to ‘Agency Import’ and select the relevant ‘Default VAT’ and ‘Currency’ from the dropdown lists.
Step 6: Click the Load Data icon  and once your data appears in the grid click “Pre-Process”.
Pre-processing reads and validates all data in the template and the software will notify you if any of the mandatory fields are missing. If the pre-process is successful, click ‘Import Now’; if not, you can click ‘Cancel’, make any necessary changes to your agency details and repeat from Step 4.
Once the agency has been imported successfully, you’ll see a pop-up message confirming this.