1. Creating a New Advisor account
Follow the below steps to create a new Collegia pension scheme and integrate it with Primo.
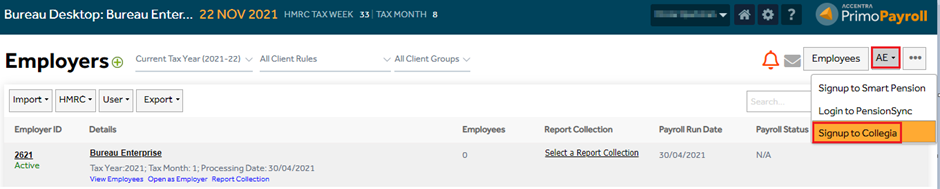
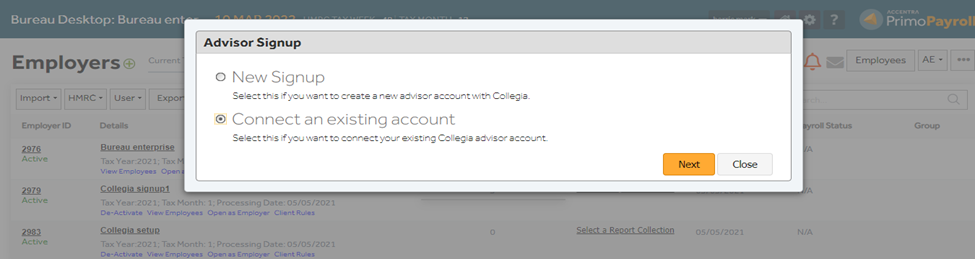
Step 1:
Employer list Screen--> AE dropdown--> Sign up to Collegia
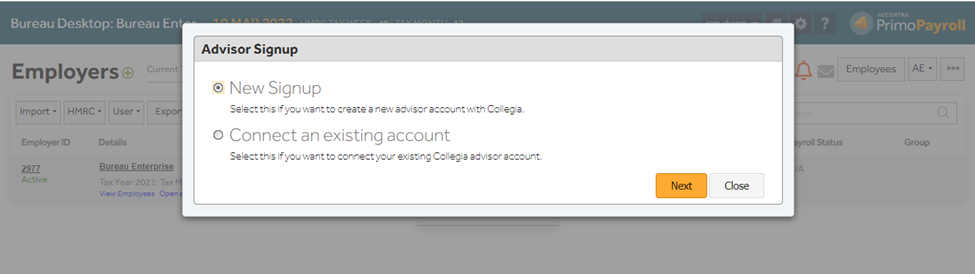
Step 2:
Select the 'New Signup' and click 'Next'.
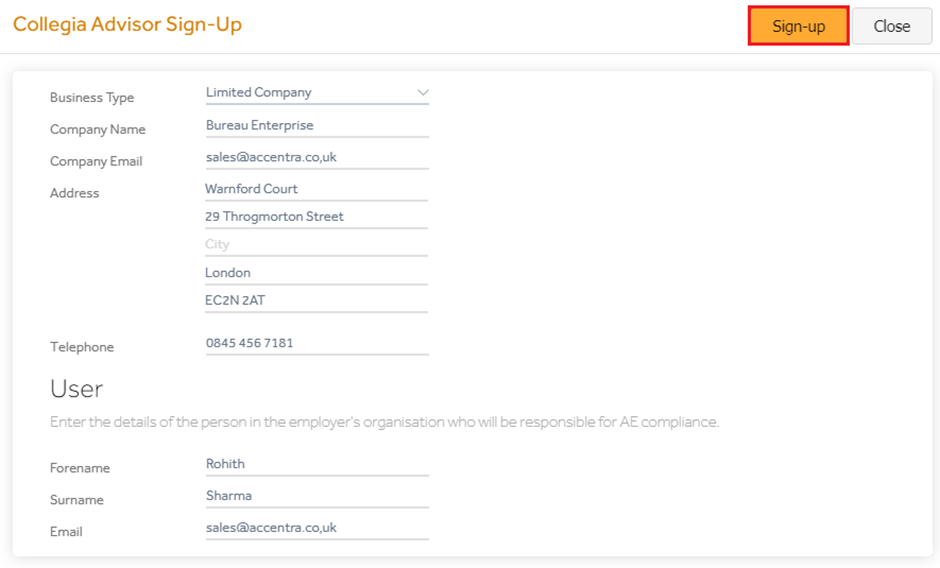
Step 3:
Fill in the below details and click the Sign-up button.
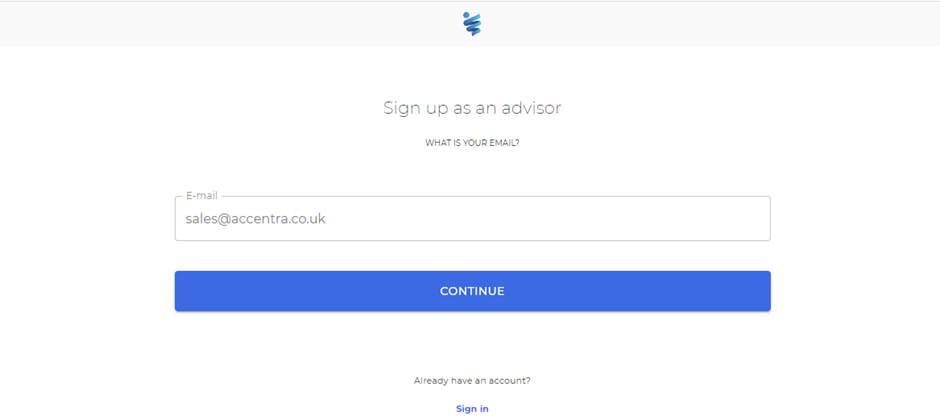
Step 3:
This will redirect to the Collegia portal where you’re required to complete the advisor signup.
Once the advisor account has been created on Collegia, you’ll be able to continue integrating the pension schemes of the client companies.
After creating the advisor account on Collegia, the bureau company can create new pension schemes for their client companies or link an already existing pension scheme as listed below.
2. Connecting an Existing Advisor account
Follow the below steps to integrate an existing Collegia pension scheme with Primo.
Step 1:
Employer list Screen--> AE dropdown--> Sign up to Collegia
Step 2:
Select the second option 'Connect an existing account' and click 'Next'.
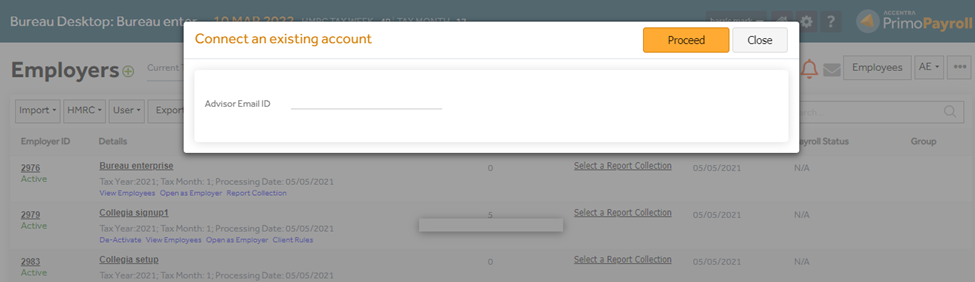
Step 3:
Specify the existing Collegia account's advisor email ID and click 'Proceed'. This will submit your request to Collegia. You should log in to your Collegia account and authorise this request from My Account--> Manage Softwares, before making further requests from Primo.
3. Creating a new Collegia pension scheme
Follow the below steps to create a new pension scheme with Collegia (for employers who do not have a pension scheme with Collegia).
Step 1:
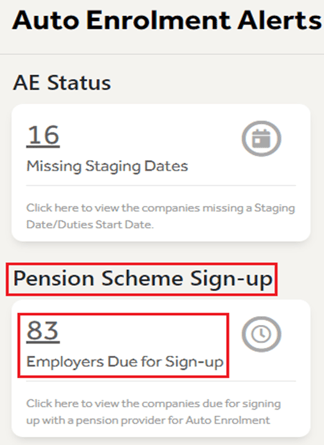
From the ‘Employers List’ screen, click the ‘Notifications (Bell Icon)’ and click the ‘Auto Enrolment Tasks’.

Step 2:
In the pension scheme sign up section, click the ‘Employer due for sign-up’ and click the ‘Sign-up’ button for the required company. If the required company is not listed here, you'll have to enter the duties start date/Staging date in the company AE Settings and try again.

Step 3:
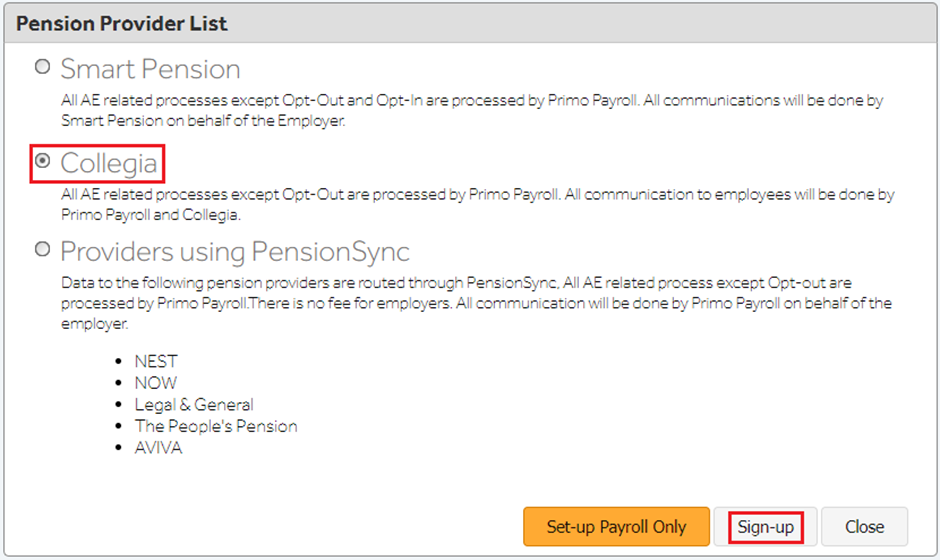
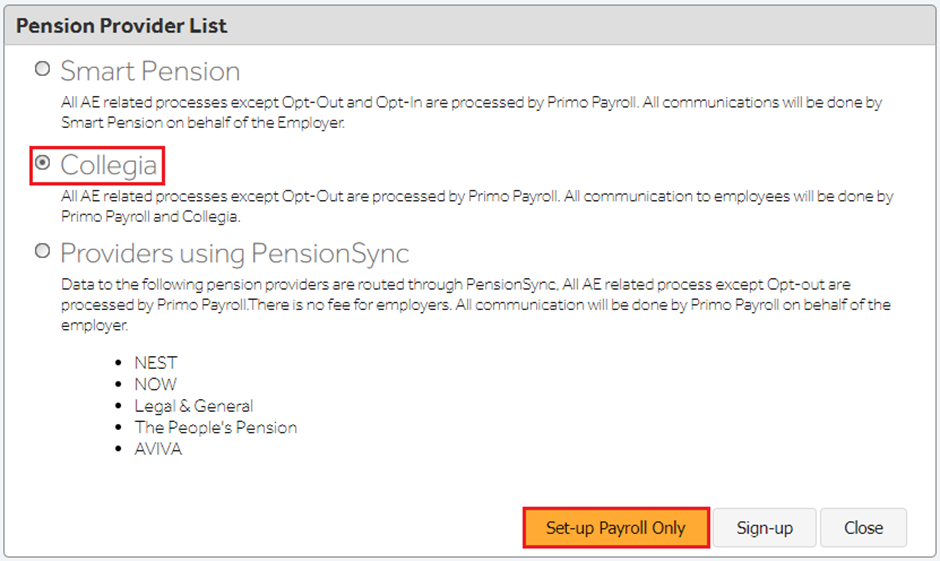
Select ‘Collegia’ and click the ‘Sign-up’ button.
Step 4:
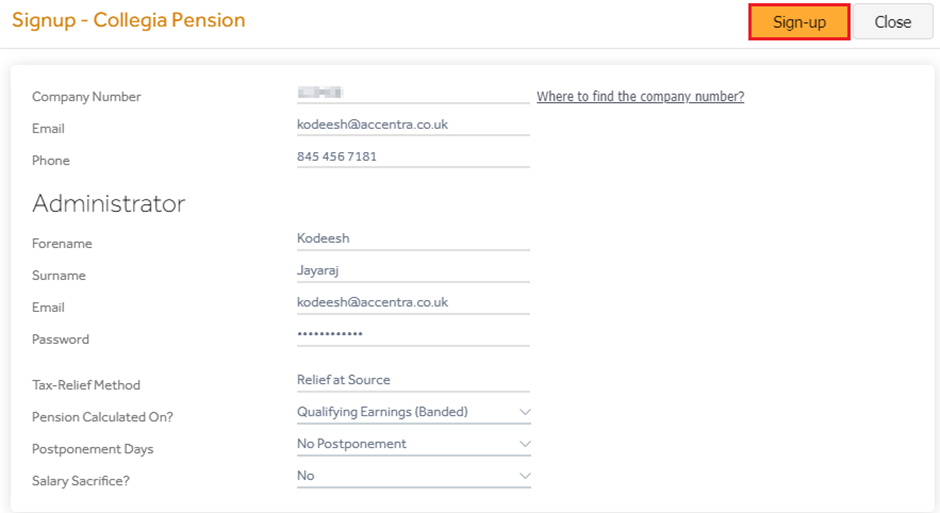
On this screen, fill in your company details. If you’re not sure about the Company Number, click the help button ‘Where to find the company number?’. This will open a new tab redirecting to the Companies house from where you can search the company name.
Enter the ‘Administrator’ details and select the pension scheme type from the dropdown. Once completed, click the ‘Sign-up’ button which will create a Collegia pension scheme.
Step 5:
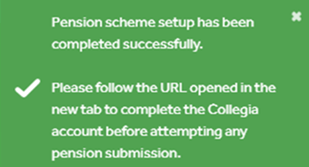
A confirmation message will appear upon successful sign-up. The program will automatically open a new tab redirecting you to the Collegia website where you need to create an account with Collegia. Once the Collegia account has been created, you’ll be able to submit the pension contributions from Primo Payroll.
4. Connecting an existing Collegia pension scheme
Follow the below steps to connect an existing Collegia pension scheme (for employers who already have a pension scheme with Collegia).
Step 1:
From the ‘Employers List’ screen, click the ‘Notifications (Bell Icon)’ and click the ‘Auto Enrolment Tasks’.
Step 2:
In the pension scheme sign up section, click the ‘Employer due for sign-up’ and click the ‘Sign-up’ button for the required company. If the required company is not listed here, you'll have to enter the duties start date/Staging date in the company AE Settings and try again.

Step 3:
Select ‘Collegia’ and click the 'Set-up Payroll Only' button.
Step 4:
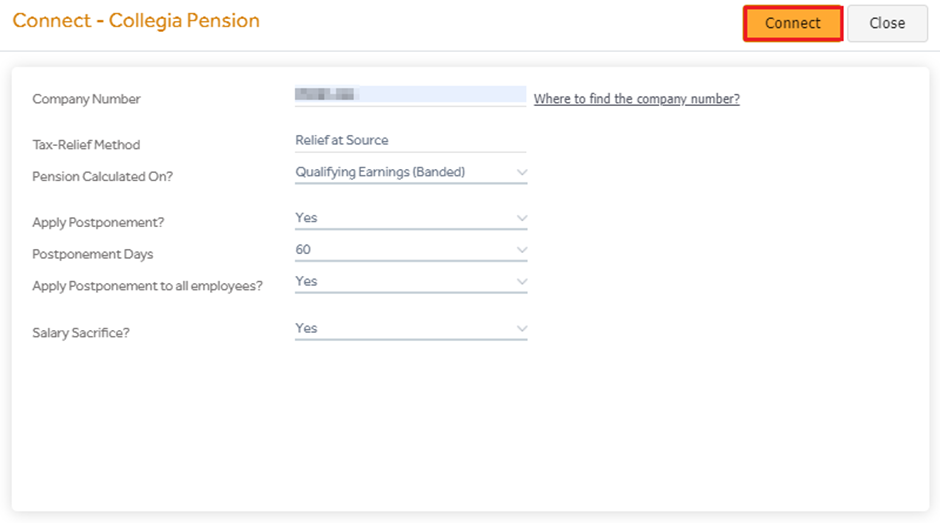
On this screen, fill in your company details. If you’re not sure about the Company Number, click the help button ‘Where to find the company number’. This will open a new tab redirecting to the Companies house from where you can search the company name.
Select the pension calculated on, Apply Postponement, and Salary Sacrifice scheme type from the dropdown. Once completed, click the “Connect” button it will set up the Collegia pension scheme.
Step 5:
A confirmation message will appear upon successful set-up. The program will automatically open a new tab redirecting you to the Collegia website where you need to authorise the primo payroll by login into the Collegia account. Once the account is authorized, you’ll be able to submit the pension contributions from Primo Payroll.

5. Disconnecting & Reconnecting Collegia Pension Integration
From your Collegia account, you've got the option to 'Disconnect' the integration between Primo & Collegia. If you've done so for some reason, Primo will not be able to submit the pension contributions when the period is closed. So, you'll have to again 'Reconnect' the Primo-Collegia integration from your Collegia account for Primo to submit the pension contributions.
Collegia Portal --> My Account --> Manage Softwares --> Authorise